Applicable inspection schedules: Schedule 2
Before you begin:
- set the parking brake
- shut off the engine
- block the wheels
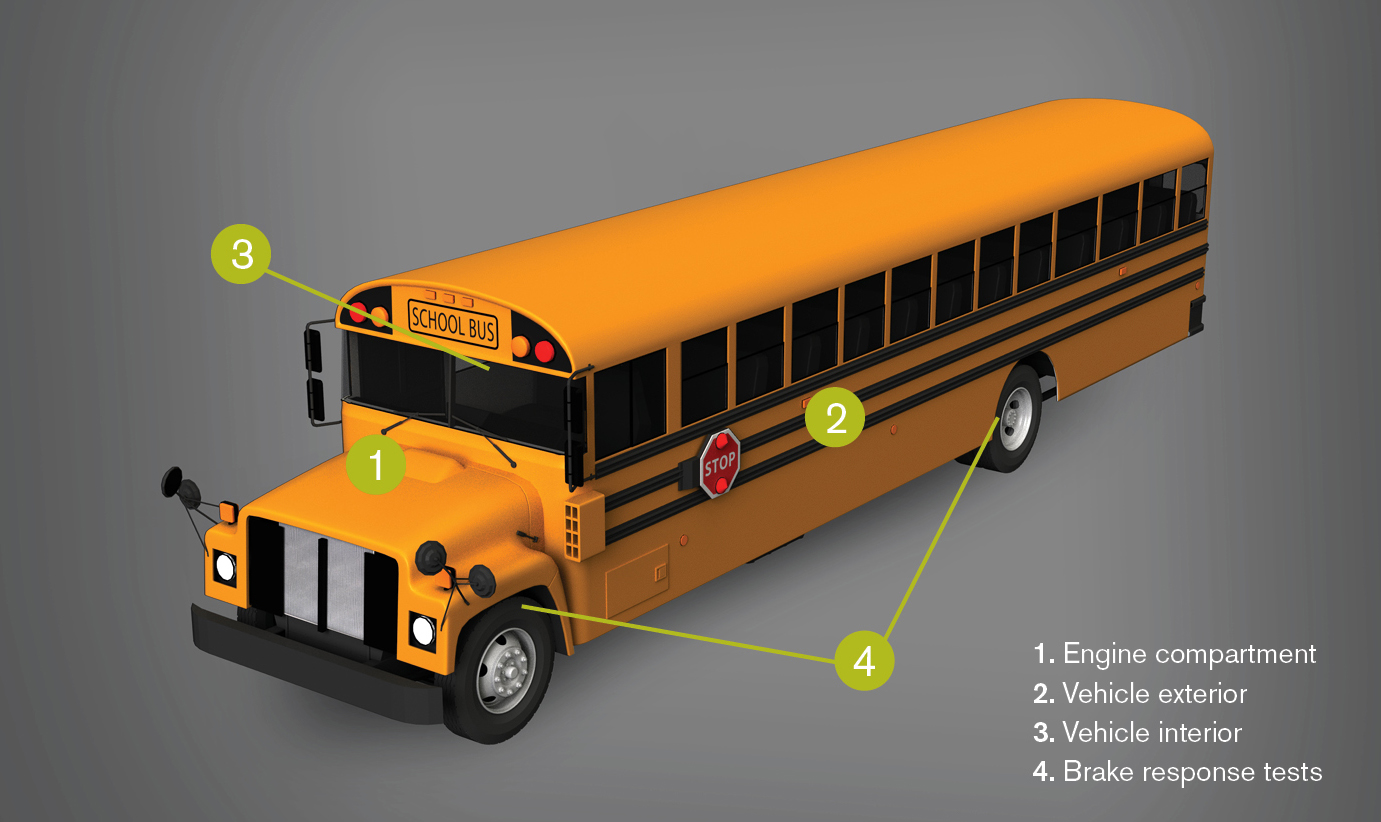
1. Engine compartment
Open the engine compartment and make sure the safety lock for the hood or compartment door is in the locked position, if equipped.
Inspect the following items:
| Fluid levels | All fluids must be at a safe operating level, including:
|
|---|---|
| Belts | Check all drive belts for tension, wear, cracks and fraying. Note: Never check the belts while the engine is running. |
| Hoses | Check all hoses for leaks, fraying, poor connections or damaged hose clamps. |
| Electrical wiring and connections | Check for bare wires or loose connections and make sure wiring is securely attached to the vehicle. |
| Steering | Steering linkage system components are not loose or damaged and no excessive free play. Bolts, nuts, clamps, universal joints are not missing or badly worn. |
2. Vehicle exterior
If there are multiples of the same item on the vehicle, you must inspect each item the same way. For example, on a typical school bus, there will be a minimum of six tires and rims that need to be inspected individually.
Inspect the following items:
| Headlights | Both the low beam and high beam lights must be working. |
|---|---|
| Hazard lights | Check the operation of all hazard lights on the front, sides and rear of the bus. |
| Signal lights | Check the operation of both the left and right signal lights on the front, sides and rear of the bus. |
| Safety lights and stop arm | Make sure all safety lights are working. Check the operation of the stop arm. |
| Strobe light | Make sure it is working. |
| Clearance, marker and identification lights | Check that all lights on the top, front, rear, and along the sides of the bus are working. |
| Tail lights | Make sure they are working. |
| Brake lights | Make sure they are working. |
| Reflective tape | All reflective tap must be properly affixed and not damaged. |
| Inspection decal | Must be properly affixed and valid. |
| Mirrors | All mirrors must be securely attached to the vehicle and not damaged. |
| Batteries | Check for corrosion and leaks. Make sure the batteries and the battery cables are secure. Make sure the battery compartment cover is on and securely attached. |
| Fuel tank | Fuel cap is on and secure. Tank is secure. Fuel lines are secure and there is no fuel leaking. |
| Exhaust leaks | Make sure there are no audible or visible signs of leaks. |
| Fluid leaks | Look for fluid leaks underneath the bus. |
| Suspension | All suspension components on each axle must be secure and not damaged, including:
|
| Frame | Where the frame is visible, look for damage or cracks. |
| Tires | Check each tire for:
|
| Rims | Look for damage or cracks. |
| Lug nuts | Look for missing lug nuts. Look for rust or shiny rings around the contact surfaces to indicate a loose lug nut. |
| Hubs | Must not be cracked, bent, distorted, worn, missing or leaking. If a sight glass is visible, you must also check that the hub oil is at a safe operating level. |
| Cargo doors | If equipped, must be closed and secure. |
3. Vehicle interior
For the in-cab inspection, some of the items will need to be inspected while the engine is running. We recommend starting the engine before you begin the in-cab inspection.
Inspect the following items:
| Driver seat | Make sure the seat is secure and properly adjusted for you. |
|---|---|
| Driver seat belt | Fasten and unfasten seat belt to make sure it works properly. |
| Passenger seats | All seats must be secure. |
| Passenger seat belts | If equipped, all passenger seat belts must be checked for proper operation. |
| Doors and emergency exits | All entry doors must open and close properly. All emergency exits including doors, windows and roof must open and close properly, and the audible alarm must work. |
| Accessibility devices | If equipped, make sure they work properly. |
| Mirrors | All mirrors must be clear, unobstructed and not damaged. Make sure all mirrors are properly adjusted for you. |
| Windshield | Must be clear, unobstructed and not damaged. |
| Windshield wipers and washer | Check the wipers for damage and make sure they wipe properly. Turn on the windshield washer to make sure it works properly. |
| Windows | Side and rear windows must be clear, unobstructed and not damaged. |
| Steering | Check for excessive free play. |
| Horn | Make sure it is working. If equipped with both an air horn and an electric horn, make sure both are working. |
| Accelerator pedal | With the engine idling, depress the pedal and release. Check for binding or sticking. |
| Clutch pedal | If equipped, check for free play and amount of travel. |
| Interior lights | Make sure all lights for both the driver and passenger compartments are working. |
| Instrument panel | Make sure there are no warning lights present. Turn on the left and right signals, hazard lights and high beams to make sure the indicator lights are working properly. |
| Gauges | Engine must be running. Identify each gauge and make sure each gauge is in its normal operating range. |
| Switches | Engine does not have to be running, but the key must be turned on. Identify each switch and make sure each switch is in its normal operating position. |
| Heater, defroster and fan speed | For both the driver and passenger compartments:
|
| Fire extinguisher | Must be located where it can be easily reached by the driver. Must be secure and properly charged. |
| Flares, reflectors or triangles | A minimum of three flares/reflectors must be present. |
| First aid kit | Must be present, secure and sealed. |
4. Brake response tests
Before driving anywhere, it is important to make sure that your brakes work. This section will explain how to test both the foot brake and the park brake for proper operation.
Remove the blocks and test the following items:
| Park brake | With the park brake applied, try to gently pull ahead. |
|---|---|
| Foot brake | Release the park brake, drive slowly ahead and apply the foot brake. |